Foreword
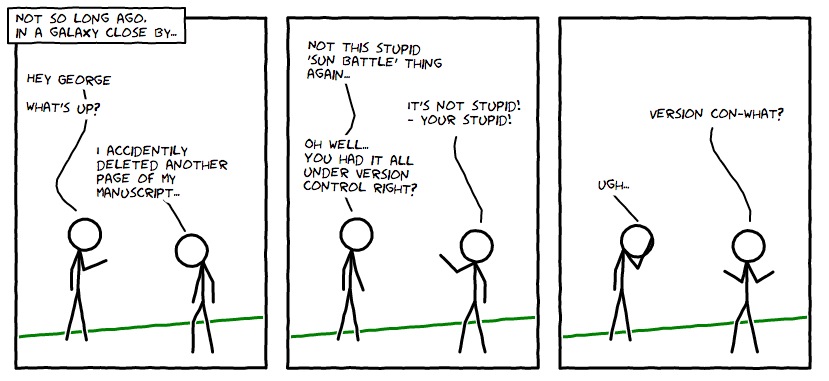 Image created using the awesome Comix I/O … and yes, this comic is under version control. :)
This session introduces the concept of version control and its particular importance for researchers. We will also try out some practical examples using the Git version control system and touch on the following topics:
- basic usage (creating a repository, adding files, committing changes)
- branches
- merging and conflicts
- online hosting and collaboration
This tutorial follows the excellent tutorial by Simon Mutch (Astroinformatics 2013), with modifications here and there by Dany Vohl (Astroinformatics 2017).
What is version control?
Version control, a.k.a. revision control / source code management, is basically a system for recording and managing changes made to files and folders. It is commonly used to manage source code, however, it is also well suited to tracking changes to any kind of file which contains mostly text. It can also be used by a lone developer or as a means for many people to share and collaborate on projects efficiently and safely.
Chances are, you already employ your own version control system, even if you don’t realise it… Many modern editors such as Microsoft Word and Apple Pages have this facility built in. Also Dropbox maintains a full history of all of the files you have deletes and edited during the last month.
You have almost certainly employed your own simple form of a version control system in the past. Here is an example:

This image shows the files and folders making up a paper fictitious paper
submission. There are a number of saved copies of the final article.tex
which have created incrementally as the paper has been written, redrafted and
submitted. These are called revisions. By looking at any of these
revisions we are able to see the state of the paper as it was when the revision
file was saved. By comparing revision files we can also get a rough idea of
how the paper developed and changed as it was written. Of course, the more
saved revisions we have, the easier it is to piece together how things changed
over time.
Why you should use it (for everything)?
In practice, everything that has been created manually should be put in version control, including programs, original field observations, and the source files for papers.
– Best Practices for Scientific Computing; Wilson et al. 2012 arXiv:1210.0530
An important aspect of any scientific endeavour is reproducibility. We should be able to replicate every figure we have ever published, even if we have significantly developed our codes and tools since.
As astronomers, we spend much of our time writing code, whether it be a simulation code or an observational reduction pipeline. As such, our codes are often constantly evolving. By putting all of our code under version control we can:
- tag code versions for later reference (via tags).
- record a unique identifier for the exact code version used to produce a particular plot or result (via commit identifiers).
- roll back our code to previous states (via checkout).
- identify when/how bugs were introduced (via diff/blame).
- keep multiple versions of the same code in sync with each other (via branches/merging).
- efficiently share and collaborate on our codes with others (via remotes/online hosting).
It’s important to also realise that many of the advantages of version control are not limited to just managing code. For example, it can also be useful when writing papers. Here we can use version control to:
- bring back that paragraph we accidentally deleted last week.
- try out a different structure and simply disregard it if we don’t like it.
- concurrently work on a paper with a collaborator and then automatically merge all of our changes together.
The upshot is you should use version control for almost everything. The benefits are well worth it…
Introducing… Git!
In this tutorial we will be using Git for version control.
Git is a free and open source distributed version control system designed to handle everything from small to very large projects with speed and efficiency.
Git is easy to learn and has a tiny footprint with lightning fast performance. It outclasses SCM tools like Subversion, CVS, Perforce, and ClearCase with features like cheap local branching, convenient staging areas, and multiple workflows.
The main feature of Git that sets it apart from other alternatives is that its distributed. This means every person has their own complete copy of the entire repository and can make changes as they like, only committing to, or checking out from, the ‘central’ repository when they are happy. With more traditional “centralised” systems such as Subversion, users must have access to the central repository to commit any changes. With Git, you could happily work away on a plane without an internet connection.
Git is also much faster than many alternatives, such as Subversion, and is written primarily in C and shell script. Finally - it’s worth noting that Git was originally written by the famous Linus Torvalds (creator of Linux).
Basics
First steps
I’ll assume that you already have git installed on your system. If not then probably the easiest way to achieve this is to download an installer from here.
Once you have Git installed, the next step is to provide it with your name and email address which will be used to sign your commits. This provides us with the ability to see who made what changes when collaborating on a project.
Type the following in a terminal, making the obvious substitutions:
    % git config --global user.name "G Lucas"
    % git config --global user.email glucas@jabbaspalace.edu.au
Next you need to tell Git what editor you want to use when Git needs you to type something:
% git config --global core.editor vim
You should replace vim with your favorite editor (e.g.
emacs, nano, subl, etc.).
You can also make things a little easier on the eyes by telling Git to add some color to its messages:
% git config --global color.ui true
Now that you are all set up we can start looking at actually using Git for version control. In what follows, we will use writing and collaborating on a LaTeX paper as an example project…
Creating a repository
First of all we need to start our paper by creating a repository.
Decide where you would like your paper to be stored and cd to that
directory. Once there, create a new directory for the paper:
    % mkdir dummy_paper
    % cd dummy_paper
Now initialise your empty repository by typing:
% git init
To check everything has been successful type:
% ls -a
and you should see the directory .git. This special folder is where Git
will store and manage the version control history of your project.
warning:
Unless you are familiar with Git it is generally best to avoid touching the
.gitfolder or it’s contents.
Adding files
Now we have our fresh Git repository. The next step is to start adding files!
Use your editor of choice to start a LaTeX file named paper.tex in your
project directory (dummy_paper). Add the following to your file and save
your changes:
    \documentclass{article}

    \title{A dummy paper}

    \begin{document}
    \maketitle

    \section{Introduction}
    A long time ago in a galaxy far, far away...

    \end{document}
note:
If you are unsure what editor to use you can try
nanofor this simple exercise:``% nano paper.tex``To save and exit the file press
Control-x, then answer the question with theykey, before finally accepting the filename presented by hittingEnter.
Now let’s check the status of our repository using the following command:
% git status
You should see something similar to the following:
    # On branch master
    #
    # Initial commit
    #
    # Untracked files:
    #   (use "git add <file>..." to include in what will be committed)
    #
    #	paper.tex
    nothing added to commit but untracked files present (use "git add" to track)
This tells us that paper.tex currently falls under the category of
“untracked” files. In other words, Git is not tracking any changes we make to
this file.
In order to tell Git to start tracking our new file, use the following command:
% git add paper.tex
Committing changes
At this point, if you type again:
% git status
you should see something like the following:
    # On branch master
    #
    # Initial commit
    #
    # Changes to be committed:
    #   (use "git rm --cached <file>..." to unstage)
    #
    #	new file:   paper.tex
    #
This tells us that we have changes to our repository (here the creation of a new
file called paper.tex) that need to be “committed”.
Committing changes to the repository is the key step of version control. This is where we save a snapshot of the current state of all tracked files. To commit our current changes type:
% git commit
This will bring up your favorite editor to allow you to provide a “commit message”. On the first line of the file write the following commit message:
Add basic structure of paper.tex
then save and exit.
That’s it! We have now created a repository, added our first file and committed our changes.
Tip:
Writing good commit messages will make your life much easier in future when trying to track down particular changes. The first line should be a short (i.e. less than 80 characters), descriptive message that makes it clear what the relevant changes being committed are. If more detail is required then leave a blank line and add a longer more descriptive message there.
Also note that the norm is to use the future tense in a commit message.
i.e. if you were to apply the changes in the commit, the message would say
what would happen...
Staging modified files
Add another section to paper.tex with the following:
    \section{A New Hope}
    That's no moon, that's a battle station.
If you now run git status, you should see the following:
    # On branch master
    # Changes not staged for commit:
    #   (use "git add <file>..." to update what will be committed)
    #   (use "git checkout -- <file>..." to discard changes in working directory)
    #
    #	modified:   paper.tex
    #
    no changes added to commit (use "git add" and/or "git commit -a")
What Git now tells us is that paper.tex falls under the category of
“Changes not staged for commit”. This means the file has changed since the last
commit, however, we haven’t told Git that we want to include these new changes
in our next commit. To do that, we must “stage” the file using git add
again:
% git add paper.tex
A final check with git status should show that paper.tex now falls
under the category of “Changes to be committed”.
Exercise 1a
Add another file to your git repository called
appendix.tex. You can put whatever you want in here (or just leave it empty), but don’t forget toaddit to your repository.Go ahead and commit your staged changes to both
paper.texandappendix.tex.
Dealing with mistakes
Perhaps you make a typo in your commit message, or maybe you forget to stage an
important change before committing. In this case you can easily amend your
last commit using the git commit --amend command.
Let’s imagine that we forgot to add the file bibliography.tex to our
repository when we made our last commit. To fix this, first create the file and
then stage it into the index. Finally, run git commit --amend:
    % touch bibliography.tex
    % git add bibliography.tex
    % git commit --amend
You will then be given the opportunity to change the last commit message if you want to.
Deleting and moving files
To delete a file in your repository use the git rm command. This will both
delete the file from the file system and stage this deletion action for your
next commit.
Alternatively, you can tell Git to remove a file from the repository (stop
tracking the file) without actually deleting it from the file system. This is
achieved by passing the --cached flag to the rm command (i.e. git rm
--cached <filename>).
Exercise 1b
Remove the bibliography.tex file you added in Exercise 1a using the
git rm <file>command. Remember to commit afterwards!
To move or rename a file, use the git mv command. This will again both move
the file and stage this change to the repository.
The circle of life
At this point we have covered the basic “life cycle” of files and changes in Git. Each file can have one of four different states:
- Untracked: It’s not listed in the last commit
- Unmodified: It hasn’t changed since the last commit
- Modified: It has changed since the last commit
- Staged: The changes will be recorded in the next commit made
The method with which we move each file from one state to another is outlined in the following diagram:
 Image source: http://adamwilson.us/RDataScience/11_Git.html.
Command summary
git init: Initialise a new Git repository.
git status: Check the current status of a repository.
git add: Stage new and modified files.
git commit: Commit staged changes.
git commit --amend: Amend the last commit.
git rm: Delete a file and stage this change.
git mv: Move a file and stage this change.
Viewing and comparing commits
The commit history
The command git log displays the commit history of the current branch. If
you try it in your dummy_paper directory you should see something like the
following:
    commit 98cdaf38c12fccbfe92d4f15dc869afc12792b22
    Author: Simon Mutch <smutch@unimelb.edu.au>
    Date:   Sat Feb 16 15:56:41 2013 +1100

        Delete bibliography.tex.

    commit cc745dbfdf0421c7d84d72c75d3a52c517665fe7
    Author: Simon Mutch <smutch@unimelb.edu.au>
    Date:   Sat Feb 16 15:54:55 2013 +1100

        Add another section, appendix.tex and bibliography.tex.

    commit f615b15149a633c47f690bf891e39cb80029a71b
    Author: Simon Mutch <smutch@unimelb.edu.au>
    Date:   Sat Feb 16 15:51:06 2013 +1100

        Add basic structure of paper.tex
As you can see git log provides the unique reference (SHA-1 checksum) for
each commit, the author name and email address, as well as the date and commit
message. The entries are listed in reverse chronological order (i.e. the most
recent commit first).
There are a whole host of flags and arguments you can pass to git log to
change what information is presented and how it looks. For example, try typing:
% git log --pretty=format:"%h %s <%an>" --graph
The result should be something like this:
    * 98cdaf3 Delete bibliography.tex. <Simon Mutch>
    * cc745db Add another section, appendix.tex and bibliography.tex. <Simon Mutch>
    * f615b15 Add basic structure of paper.tex <Simon Mutch>
To investigate all the different options for formatting your log output, try
looking at the help for the log command:
% git help log
tip:
git help <command>can be used to get the documentation for almost every Git command. If you typegit helpon it’s own, you will also be presented with a list of all major commands for reference.
Its useful to be able to have this concise view of the log without having to type the long command every time. We can achieve this by adding the command as an alias. Try this command:
% git config --global alias.lg 'log --pretty=format:"%h %s <%an>" --graph'
Now you can get the concise log view by simply typing:
% git lg
Comparing commits
Often we want to compare (or “difference”) commits to see how things have
changed. To do this we use the git diff command. For example, to see how
our paper has changed between the most recent commit and our first commit I
would type:
% git diff ef5ca0a
Your commit reference will be different to mine however, and so you must
substitute the appropriate reference in place of ef5ca0a. Remember, you
can get this reference using the git log command as outlined above.
Once you run git diff successfully, you will see something like this:
    diff --git c/appendix.tex w/appendix.tex
    new file mode 100644
    index 0000000..e69de29
    diff --git c/paper.tex w/paper.tex
    index 3290236..599a0b6 100644
    --- c/paper.tex
    +++ w/paper.tex
    @@ -8,5 +8,8 @@
     \section{Introduction}
     A long time ago in a galaxy far, far away...

    +\section{A New Hope}
    +That's no moon, that's a battle station.
    +
     \end{document}
The + signs show text which has been added since our first commit, and any
- signs would indicate text which has been removed. At the top of the diff,
we can also see that we have added the appendix.tex file.
By specifying only one commit reference when calling git diff we actually
implicitly ran:
% git diff ef5ca0a..HEAD
HEAD is a shortcut for the commit reference pointing to the most recent
relevant commit. To access the second most recent commit we can use the
shortcut HEAD^. These shortcuts are handy to remember when comparing
commits.
git diff can also be used to see how the current state of files have changed
since the last commit. To do this simply run the command with no arguments.
Exercise 2a
Add a sentence to the section “A New Hope” of
paper.texbut don’t commit the change. Now try running:
% git diffand make sure you understand the results.
Another useful way to view the commit history of your repository is to use the
gitk Graphical User Interface (GUI) program which is packaged with Git. This program displays both the
commit history and relevant diffs all together. There are other GUI options like GitHub GUI.
You can find a list of options here.
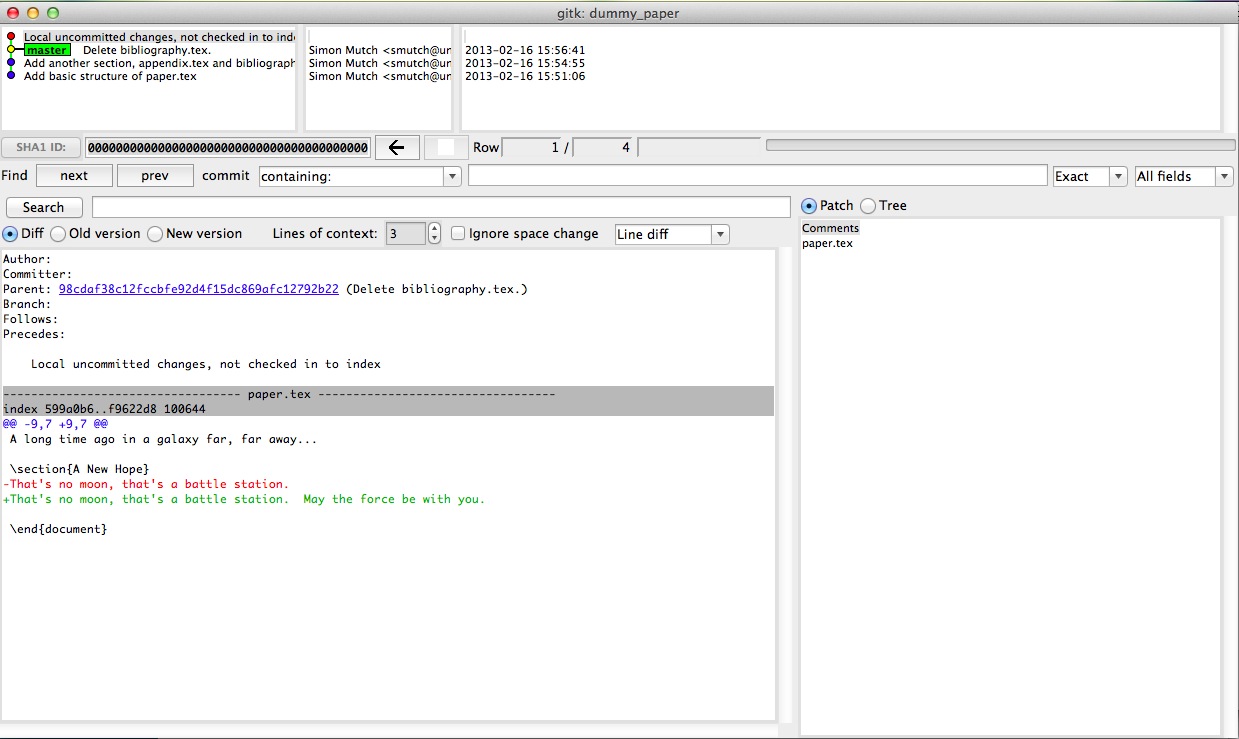 Figure: gitk
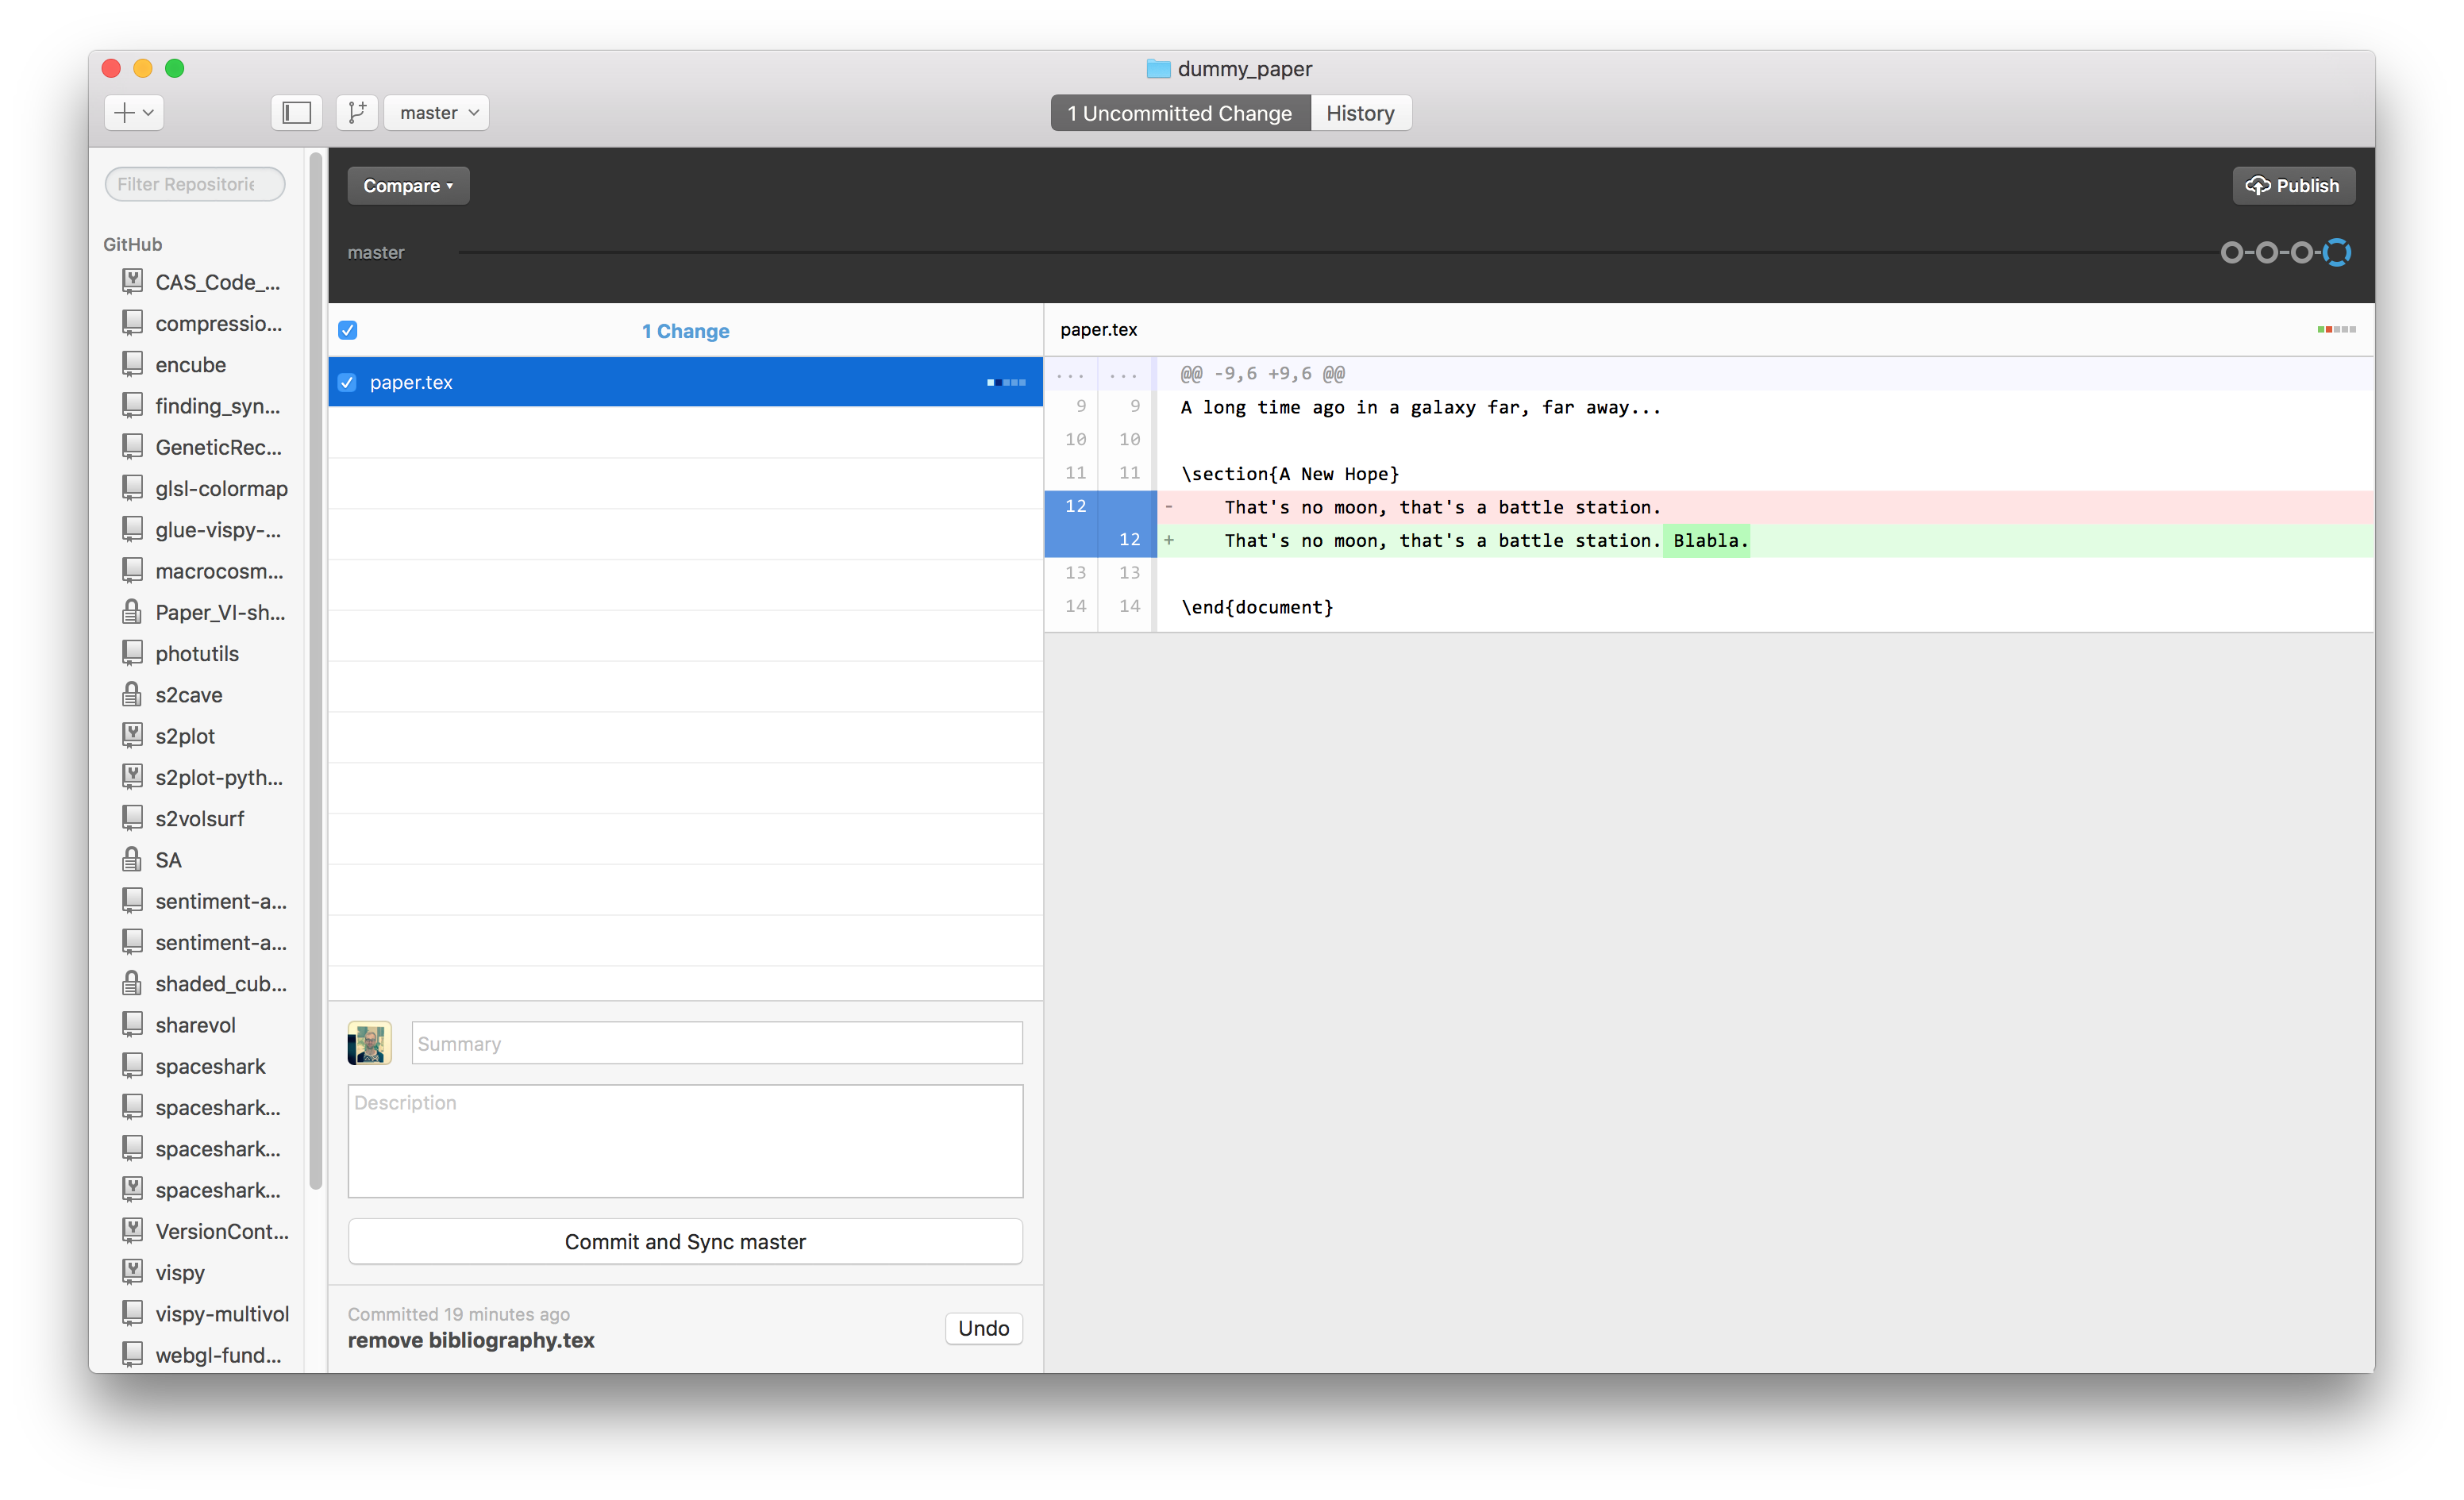 Figure: github-gui
Playing the blame game
Another useful way to visualise the history to is to look at a single file and see in which commit each line was last changed. Imagine that we identified a bug in a line of code. We could then use this technique to see how long ago that bug was introduced (and by who!). Try this:
% git blame paper.tex --date=relative
and you should see a copy of paper.tex with the reference, author and time
of the last commit where each line was modified.
Command summary
git log: View the commit history for the current branch.
git diff <commit> <commit>: Compare (difference) two commits.
gitk: View the commit history in a GUI.
git blame <file>: See when each line of a file was last changed.
Branching
What is a branch?
Branches allow you to diverge from your current development and try something new without altering the history of your main work. For example, you could implement a new code feature whilst leaving the fully functional (hopefully working and tested) code intact for others to checkout.
In Git, branching is generally quick, flexible and simple. It is a fantastic way to test out ideas, try new things and safely develop your repository. This is especially true when collaborating with other people…
Creating branches
All new repositories, by default, start on a branch called master (you
should see this name if you again run git status).
Let’s now create a new branch called risky_idea by typing the following
command inside of our dummy_paper directory:
% git branch risky_idea
Well that was simple! However, if a quick check of git status shows that we
are still on the master branch. In order to start working with our new
branch we need to perform a checkout; This moves our current “HEAD”
(remember this is what Git calls the pointer to the most recent relevant commit)
to the branch risky_idea:
% git checkout risky_idea
Running git status now should show that you are on the risky_idea
branch.
Now run:
% git log
and you should see that our earlier commits from the master branch are still
there. When running git branch, the newly created branch inherits the
history of the original branch we diverged from (in this case the master
branch). However, any subsequent commits to the new branch will not exist in
the original.
Exercise 3a
Add another section to
paper.texwith the following:\section{The Empire Strikes Back} Laugh it up fuzz-ball!...Then stage and commit your changes. Finally, compare the
risky_ideabranch with the tip of themasterbranch usinggit diff:% git diff master
Command summary
git branch: Create a new branch.
git checkout: Checkout a branch/commit.
Merging and dealing with conflicts
Merging and conflicts
At this stage we have two branches, master and risky_idea. Let’s
imagine that we have continued to work away on the risky_idea branch,
committing our changes as we go…
Merging
At some stage we will want fold our changes in the risky_idea branch back
into the master branch. We do this by “merging” the risky_idea branch
into master.
First we checkout the master branch:
% git checkout master
If you run git log you should see that none of your commits to the
risky_idea branch are present. You can further confirm this by looking at
the contents of paper.tex; The section “The Empire Strikes Back” shouldn’t
be present.
Now merge risky_idea into our current branch using the following command:
% git merge risky_idea
If everything runs smoothly, running git log should show your commits from
the risky_idea branch.
At this stage you could either checkout the risky_idea branch again and
continue working, or if you are finished with it you can delete it.
We no longer need the risky_idea branch, so delete it using:
% git branch -d risky_idea
Dealing with conflicts
Typically, as above, a git merge will progress smoothly with Git
automatically working out how to merge the two branches. Occasionally however,
this is not the case. In particular if we have made changes to two different
branches which directly conflict with each other, then a merge will require us
to tell Git which change is the correct one. We will now engineer such a
situation…
First create a new branch called episode5 and check it out:
    % git branch episode5
    % git checkout episode5
tip:
In situations where you want to create a new branch and immediately check it out (as above) you can use the following shortcut:
% git checkout -b <branch_name>
Then add another section to paper.tex with the following:
    \section{Revenge of the Jedi}
    That blast came from the Death Star! That thing's operational!
Commit your changes:
    % git add paper.tex
    % git commit
Now we have a new branch with a new commit that adds a section to our paper.
However, imagine the situation where we decide we want to leave this section for
the moment and go back to working on our second section. To do this, we return
to our master branch. During the course of our edits we come up with
another name for our newest section though, and pen this in so that we don’t
forget. This will lead to a conflict when we later merge our episode5
branch back into master. Let’s replicate this conflict now to see what
happens…
First checkout master:
% git checkout master
Then edit paper.tex, this time with the text:
    \section{Return of the Jedi}
    That blast came from the Death Star! That thing's operational!
Again, stage and commit your changes:
% git commit -a
note:
Note that we used
git commit -ahere to stage and commit our changes in one go. This is a very useful shortcut. However, it will only stage changes in files which are already being tracked by the repository. i.e. if you add a new file to your project, you will still need to rungit addfor Git to start tracking it. Additionally, it will stage all changes, so you have less control over what changes go into each commit.
Now our two branches master and episode5 have commits in them which
directly conflict. Running the merge command from the master branch will
flag this conflict and Git will ask us for help. Try it now:
% git merge episode5
and you should be presented with the following message:
    Auto-merging paper.tex
    CONFLICT (content): Merge conflict in paper.tex
    Automatic merge failed; fix conflicts and then commit the result.
This tells us that a conflict has occurred in paper.tex.
To resolve the conflict open up paper.tex in your favorite editor. The
offending section will look something like this:
    <<<<<<< HEAD
    \section{Return of the Jedi}
    =======
    \section{Revenge of the Jedi}
    >>>>>>> episode5
Everything between the lines <<<<<<< HEAD and ======= are what exists in
the HEAD commit (the tip of the master branch in this case). Between
the lines ======= and >>>>>>> episode5 is what exists in our
episode5 branch.
In order to resolve the conflict, pick which of the section headings we want to
use and remove the other lines (including the ======= line and those lines
starting with > or < symbols. In our case we want to keep the section
title from the master branch, and so we need to leave only that line:
\section{Return of the Jedi}
After you have edited and saved paper.tex, finish the merge by staging and
committing your results:
% git commit -a
The commit message will be auto-populated for you, and so there is no need to edit it.
Command summary
git merge: Merge branches and commits.
git branch -d: Delete a branch.
git commit -a: Stage all changes in tracked files and commit them.
Collaboration
Online hosting and collaboration
As well as managing our own codes and documents, another important use of version control is for collaboration…
Online hosting
As already discussed in the Basics section, Git uses a “distributed” model that allows everyone working on a project to have their own independent copy of the entire repository. To collaborate effectively though we need a central version of the code base which is used to unify everyones’ efforts. Typically the best place for such a central repository is online.
There are a number of excellent options for online hosting of git repositories (for a list see this Wikipedia entry). However, there are two options in particular which stand out in my opinion:
-
Bitbucket: This site overs unlimited free public repositories (where anyone can see and checkout your project). If you have an email address from an academic institution though, then you can also get unlimited free private repositories! These repositories only allow users who you specify to have access.
-
Github: This is site also offers unlimited free public repositories. With an academic institution email address you can also get 5 free private repositories. Github is probably the place for new open source software and tools. It’s a fantastic service and well worth using, especially if you want to take your own code open source. You can also use Github to serve web pages for free. This tutorial is open sourced on Github.
Cloning a repository
If you have the address (and correct permissions) for an online repository then
you can grab your own copy using the clone command. Try cloning your own
copy of the source for this tutorial (make sure you are not in your a_paper
repository when you do this):
    % git clone git://github.com/AstroinformaticsAU/VersionControlTutorial.git
    % cd VersionControlTutorial
You are now inside your own personal copy of the repository and can do whatever you want with it. Try:
% git log
and you will see that you also have the full commit history.
Collaboration strategies
Unfortunately, it is out-with the scope of this tutorial to cover all of the different ways you can collaborate with Git. There are a number of options for how to get your changes incorporated into the central repository for everyone to have access to. These include, forking and pull requests, email patches, and direct pushing.
The basic work-flow is almost always the same though:
- Make your changes in your own personal copy of the repository, ideally in a new branch.
- “Pull” (using the command
git pull) the most recent version of the central repository into yourmasterbranch. This makes sure you are up-to-date with any changes which were made by someone else subsequent to when you last pulled (or made your original clone).- Merge your changes from your new branch into
master.- Once any conflicts are resolved you can update the central repository with your new code (using for example
git push).
Further reading
For a proper introduction to hosting and collaborating with Git, see the excellent online book,
Pro Git <http://git-scm.com/book>. The help pages ofGithubare also an excellent resource.Github: https://github.com/
More resources
Tutorials
Other great tutorials and resources for learning Git include:
GUI clients
See the list on the Git homepage for a good run down on the different options here.
Miscelaneous
If you are feeling adventurous, try learning Git with Githug.
If you are looking for an excellent command line Git client try Tig.
If you use Vim then I can’t recommend enough the Fugitive plugin.
Commands overview
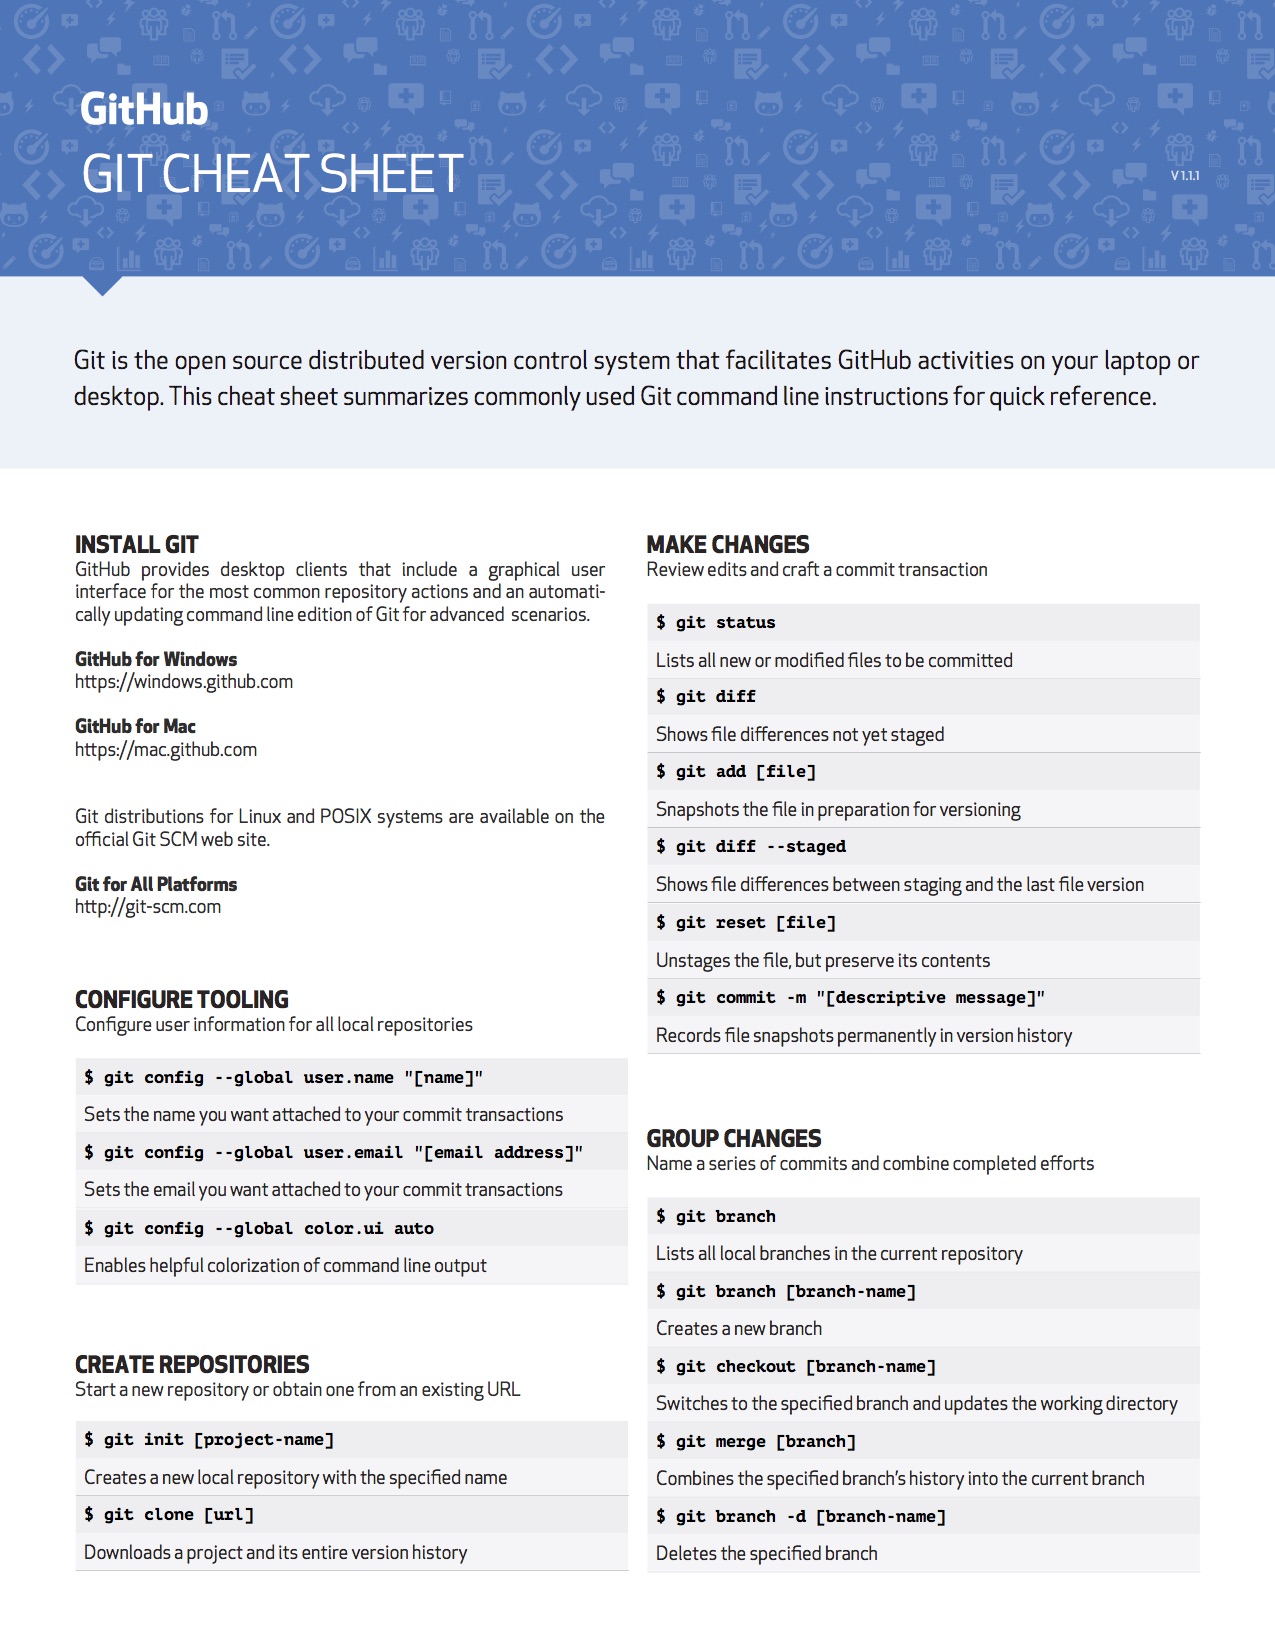
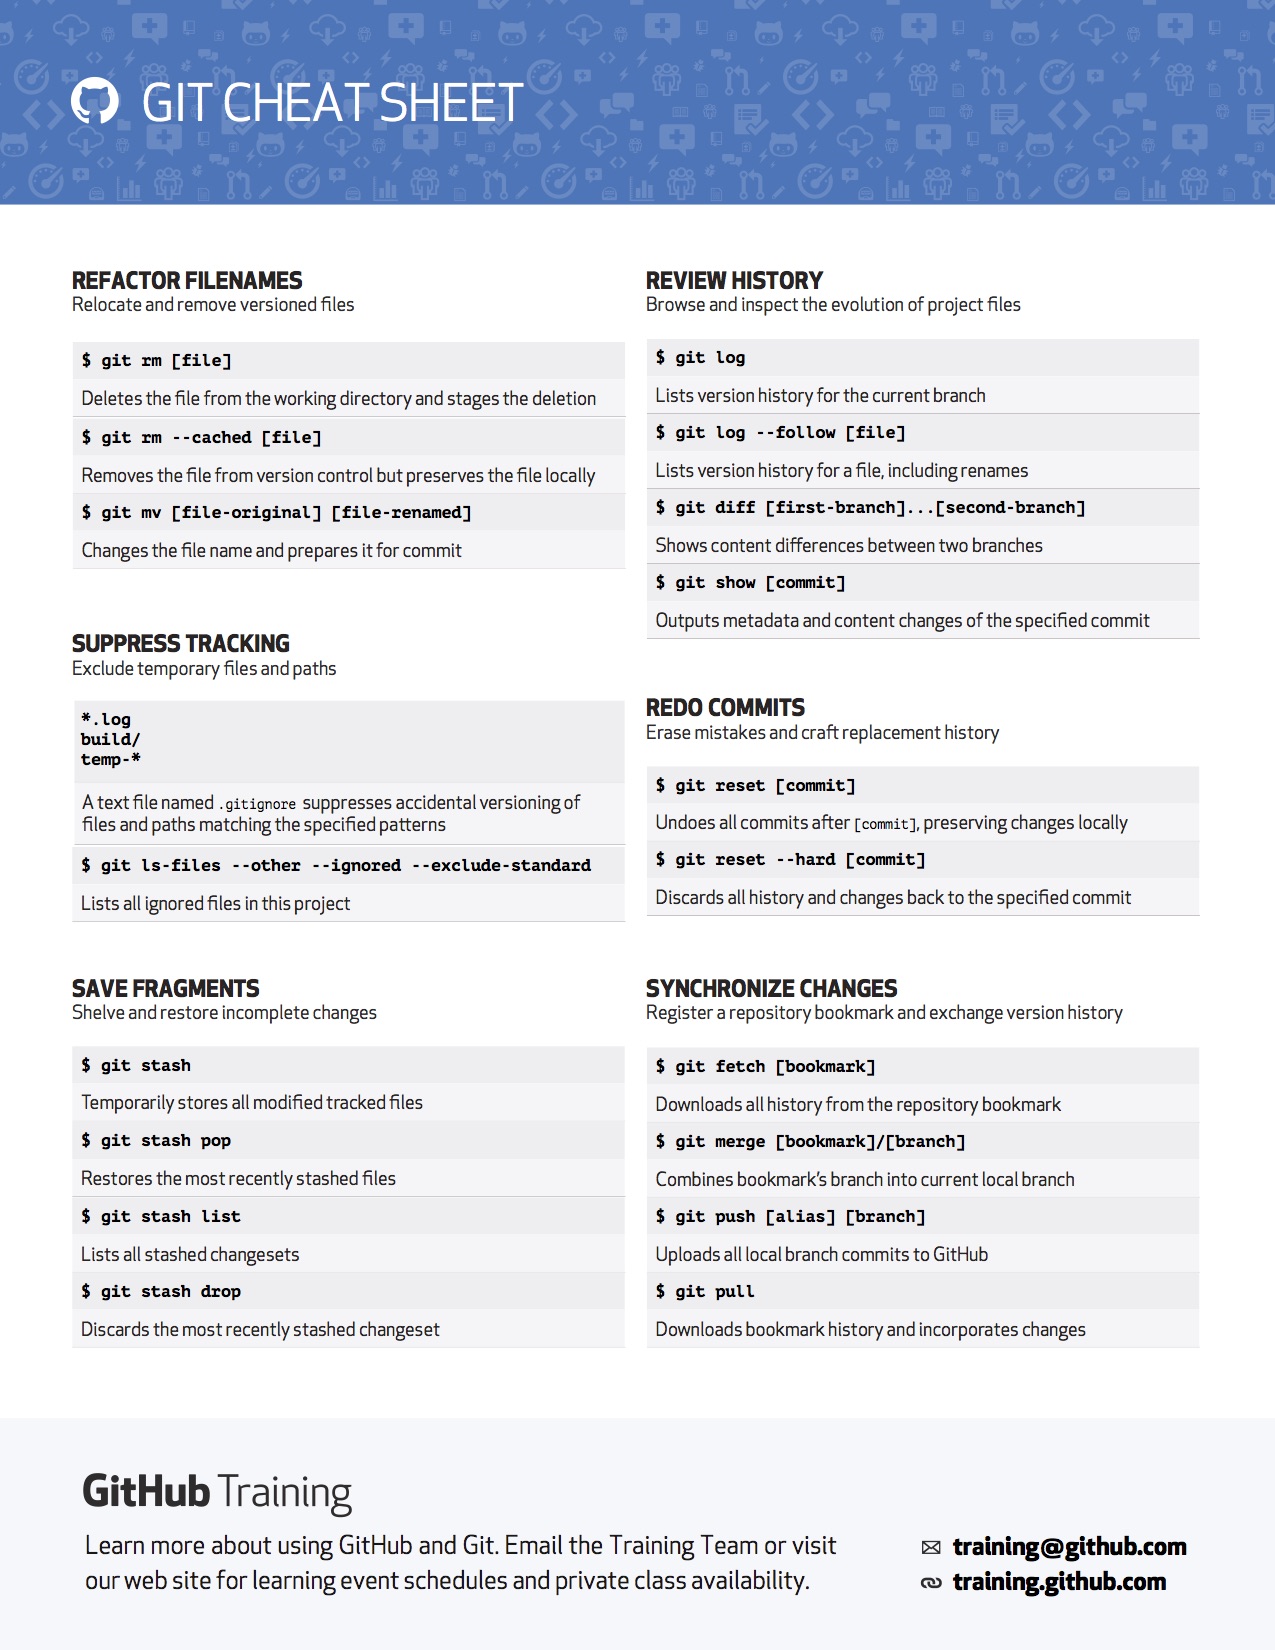
You can find the original pdf of the above figures here.
For another good `cheat sheet’-style website, I encourage you to have a look at http://ndpsoftware.com/git-cheatsheet.html.
